Appearance
雨天擦玻璃
作为 WallPaper Engine(墙裂推荐的一款 steam 动态壁纸软件) 的深度用户,有一张壁纸《Rain Day》我一直非常喜欢,逼真的雨珠顺着玻璃滑落时的折射光斑、鼠标移动时的动态视差…… 这些细节让我总忍不住想:「这么细腻的动态效果,到底是用什么技术实现的?」
直到某天,我偶然发现这款壁纸的技术标签里写着「网页」—— 作为前端开发者,DNA 瞬间动了!右键点击在资源管理器中打开,发现源码早已被打包工具混淆变量名全是a,b,c。但没关系,前端人搞逆向,主打一个拆解重组,在一些工具的辅助并在我秃头式两天两夜的折腾下,终结将几千行的混淆代码从混乱变得有序,并在我完全理解源代码逻辑后,新增了一个有趣(无聊)的功能——擦玻璃效果。
先看看效果:点击查看效果
项目结构
经过我的整理和重组,将代码用 TypeScript + ES6 Class 重新实现,代码结构如下:
plaintext
rainDay/
├─ img/                         # 纹理图片
|   ├─ drop-alpha.png
|   ├─ drop-color.png
|   ├─ texture-rain-bg.png
|   ├─ texture-rain-fg.png
├─ shaders/                     # shader文件
|   ├─ simpleVert.glsl
|   ├─ waterFrag.glsl
├─ types/                       # ts类型文件
|   ├─ index.ts
├─ utils/                       # 工具函数文件
|   ├─ index.ts
├─ index.vue                    # 主页面
├─ RainDrops.ts                 # 雨滴类
├─ RainRenderer.ts              # 场景类
├─ webgl.ts                     # webgl封装
├─ WebGlContext.ts # webgl环境类核心逻辑
实现雨滴效果的核心逻辑:
plaintext
RainRenderer更新纹理 → Raindrops生成新雨滴 → WebGL渲染(雨滴Canvas+纹理叠加)RainRenderer类
RainRenderer类主要负责将雨滴动态数据(由 Raindrops 生成的画布内容)与背景纹理、光泽纹理结合,通过着色器计算折射、阴影、光泽等效果,最终在主画布上渲染出动态、真实的雨水视觉效果,其核心功能包括:
- WebGL 初始化与配置:创建 WebGL 上下文,加载顶点 / 片段着色器,配置渲染参数(如折射范围、亮度、透明度等)。
- 纹理管理:绑定光泽、前景、背景等纹理,并支持动态更新纹理(如切换天气或背景时)。
- 视差效果处理:通过鼠标移动参数(parallaxX/parallaxY)增强画面立体感。
- 动态渲染循环:通过 requestAnimationFrame 实现实时渲染,持续将雨滴动态画布内容与纹理融合输出。
以下是RainRenderder的代码实现:
点击查看代码
typescript
import GL from "./WebGLContext";
import { createCanvas } from "./utils";
import vertShader from "./shaders/simpleVert.glsl?raw";
import fragShader from "./shaders/waterFrag.glsl?raw";
import { IRendererOptions } from "./types";

// 默认渲染配置
const defaultOptions = {
  renderShadow: false,       // 是否渲染阴影
  minRefraction: 256,        // 最小折射强度(控制纹理扭曲程度)
  maxRefraction: 512,        // 最大折射强度
  brightness: 1,             // 整体亮度系数
  alphaMultiply: 20,         // 透明度乘法系数(控制雨滴透明度)
  alphaSubtract: 5,          // 透明度减法系数
  parallaxBg: 5,             // 背景视差强度(鼠标移动时背景偏移量)
  parallaxFg: 20             // 前景视差强度(鼠标移动时前景偏移量)
};

/**
 * 雨水效果渲染核心类
 * 负责将雨滴动态(canvasLiquid)与前景/背景纹理融合,通过WebGL实现实时渲染
 */
export default class RainRenderer {
  canvas: HTMLCanvasElement;          // 最终输出画面的主画布
  canvasLiquid: HTMLCanvasElement | null;  // 雨滴动态数据画布(由Raindrops生成动态雨滴纹理)
  imageFg: HTMLCanvasElement | null;  // 前景纹理(叠加在雨滴上方的静态图像)
  imageBg: HTMLCanvasElement | null;  // 背景纹理(雨滴下方的静态背景图像)
  imageShine: HTMLCanvasElement | null;  // 光泽纹理(可选,增强雨滴反光效果)
  textures: Array<{ name: string, img: HTMLCanvasElement }> = [];  // 纹理列表
  options: IRendererOptions;
  gl: GL;
  width: number = 0;
  height: number = 0;
  programWater: WebGLProgram | null;  // 水效果渲染程序
  parallaxX: number = 0;              // X轴视差值 (没做视差处理)
  parallaxY: number = 0;              // Y轴视差值 (没做视差处理)
  rafId: number | null = null;

  constructor(
      canvas: HTMLCanvasElement,
      canvasLiquid: HTMLCanvasElement,
      imageFg: HTMLCanvasElement,
      imageBg: HTMLCanvasElement,
      imageShine: HTMLCanvasElement | null,
      options = {}
  ) {
    this.canvas = canvas;
    this.canvasLiquid = canvasLiquid;
    this.imageShine = imageShine;
    this.imageFg = imageFg;
    this.imageBg = imageBg;
    this.options = Object.assign({}, defaultOptions, options);
    this.width = this.canvas.width;
    this.height = this.canvas.height;

    this.gl = new GL(this.canvas, { alpha: false }, vertShader, fragShader);
    this.programWater = this.gl.program;

    this.init();
  }

  init() {
    const { gl } = this;

    // 向着色器传递关键Uniform变量(GPU可访问的全局变量)
    gl.createUniform("2f", "resolution", this.width, this.height);        // 主画布分辨率
    gl.createUniform("1f", "textureRatio", this.imageBg!.width / this.imageBg!.height);  // 背景纹理宽高比
    gl.createUniform("1i", "renderShine", this.imageShine != null);       // 是否启用光泽纹理
    gl.createUniform("1i", "renderShadow", this.options.renderShadow);    // 是否渲染阴影
    gl.createUniform("1f", "minRefraction", this.options.minRefraction);  // 最小折射强度
    gl.createUniform("1f", "refractionDelta", this.options.maxRefraction - this.options.minRefraction);  // 折射强度范围
    gl.createUniform("1f", "brightness", this.options.brightness);        // 亮度
    gl.createUniform("1f", "alphaMultiply", this.options.alphaMultiply);  // 透明度乘法系数(控制雨滴透明度)
    gl.createUniform("1f", "alphaSubtract", this.options.alphaSubtract);  // 透明度减法系数
    gl.createUniform("1f", "parallaxBg", this.options.parallaxBg);        // 背景视差强度(鼠标移动时背景偏移量)
    gl.createUniform("1f", "parallaxFg", this.options.parallaxFg);        // 前景视差强度

    // 纹理单元0
    gl.createTexture(null, 0);

    // 光泽、前景、背景纹理绑定到纹理单元1,2,3
    this.textures = [
      // 无光泽纹理时用2x2空画布避免着色器报错
      { name: 'textureShine', img: this.imageShine == null ? createCanvas(2, 2) : this.imageShine },
      { name: 'textureFg', img: this.imageFg! },  // 前景纹理
      { name: 'textureBg', img: this.imageBg! }   // 背景纹理
    ];

    //每个纹理创建WebGL纹理对象,绑定到着色器对应的Uniform变量
    this.textures.forEach((texture, i) => {
      gl.createTexture(texture.img, i + 1);  // 纹理单元1/2/3分别对应三个纹理
      gl.createUniform('1i', texture.name, i + 1);  // 告诉着色器该纹理使用的单元位置
    });

    this.draw();
  }

  draw() {
    const { gl, programWater } = this;
    if (!programWater) return;

    // 激活水效果渲染程序
    gl.useProgram(programWater);
    // 更新视差参数
    gl.createUniform("2f", "parallax", this.parallaxX, this.parallaxY);
    // 更新雨滴动态纹理
    this.updateTexture();
    // 绘制
    gl.draw();

    this.rafId = requestAnimationFrame(this.draw.bind(this));
  }


  updateTexture() {
    this.gl.activeTexture(0);          // 激活纹理单元0
    this.gl.updateTexture(this.canvasLiquid!);  // 将canvasLiquid的内容更新到纹理
  }

  updateTextures() {
    this.textures.forEach((texture, i) => {
      this.gl.activeTexture(i + 1);    // 激活对应纹理单元
      this.gl.updateTexture(texture.img);  // 更新纹理内容
    });
  }


  destroy() {
    this.gl.destroy();  // 销毁WebGL上下文(释放着色器、纹理等资源)
    if (this.rafId) {
      cancelAnimationFrame(this.rafId);  // 停止动画循环
      this.rafId = null;
    }
    // 清空纹理和画布引用(帮助垃圾回收)
    this.textures = [];
    this.canvasLiquid = null;
    this.imageFg = null;
    this.imageBg = null;
    this.imageShine = null;
  }
}RainDrop类
RainDrop类主要负责动态雨滴效果生成,动态产出雨水纹理: 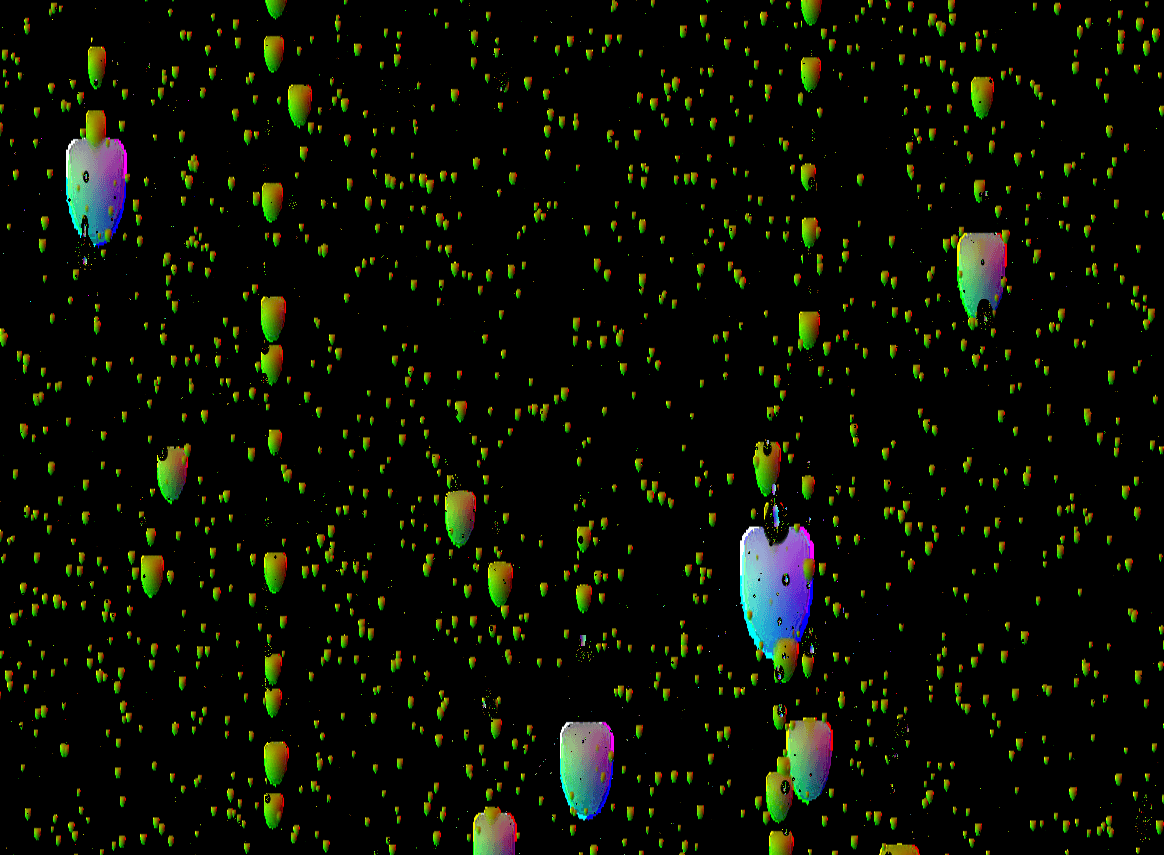 其核心逻辑如下:
- 雨滴状态管理 通过 drops 数组维护所有活跃的雨滴,每个雨滴对象包含位置、大小、动量等关键属性,通过 updateDrops 方法更新状态(如下落、碰撞、收缩消亡)。
- 动态生成与消亡 生成:在 updateRain 中基于概率生成新雨滴,位置限定在 spawnArea 区域内(如从顶部下落)。 消亡:通过 shrink 属性控制半径缩小,当半径 ≤0 时标记为 killed,后续被过滤回收。
- 碰撞检测 检测雨滴间的距离,若小于碰撞半径则合并(如大雨滴吸收小水滴,调整动量和大小)。
- 纹理绘制
- 预生成 dropsGfx 数组(255 种不同深度的雨滴纹理),通过叠加颜色(dropColor)、透明度(dropAlpha)和深度(蓝色通道)模拟立体感。
- drawDrop 方法根据雨滴大小和扩散程度选择对应纹理,绘制到画布。
- 微小水滴效果 通过 droplets 画布绘制更细腻的小水滴,updateDroplets 方法控制其生成速率和清理(如通过 destination-out 混合模式擦除旧水滴
以下是RainDrop类的代码实现:
点击查看代码
typescript
import {Drop, RaindropsOptions} from "./types";
import {chance, random, times, createCanvas} from "./utils";

const defaultRaindropsOptions: RaindropsOptions = {
  minR: 10,
  maxR: 40,
  maxDrops: 900,
  rainChance: 0.3,
  rainLimit: 3,
  dropletsRate: 50,
  dropletsSize: [2, 4],
  dropletsCleaningRadiusMultiplier: 0.43,
  raining: true,
  globalTimeScale: 1,
  trailRate: 1,
  autoShrink: true,
  spawnArea: [-0.1, 0.95],
  trailScaleRange: [0.2, 0.5],
  collisionRadius: 0.65,
  collisionRadiusIncrease: 0.01,
  dropFallMultiplier: 1,
  collisionBoostMultiplier: 0.05,
  collisionBoost: 1,
};
const initDrop: Drop = {
  x: 0,
  y: 0,
  r: 0,
  spreadX: 0,
  spreadY: 0,
  momentum: 0,
  momentumX: 0,
  trailProgress: 0,
  trailThreshold: 0,
  parent: null,
  isNew: true,
  killed: false,
  shrink: 0,
}


export default class RainDrops {
  private readonly width: number;
  private readonly height: number;
  private readonly scale: number;
  private readonly dropColorTexture: HTMLImageElement;
  private readonly dropAlphaTexture: HTMLImageElement;
  canvas: HTMLCanvasElement;
  private ctx: CanvasRenderingContext2D;
  //水痕扩散画布
  private droplets: HTMLCanvasElement;
  private dropletsCtx: CanvasRenderingContext2D;
  //活跃雨滴对象数组
  private drops: Drop[] = [];
  //预渲染雨滴图形缓存
  private dropsGfx: HTMLCanvasElement[] = [];
  //水痕清除画笔(圆形遮罩,用于模拟水痕消失)
  private clearDropletsGfx: HTMLCanvasElement | null = null;

  private dropletsCounter: number = 0;
  private dropletsPixelDensity: number = 1;
  private textureCleaningIterations: number = 0;
  private lastRender: number = 0;
  // 雨滴配置
  private readonly options: RaindropsOptions;
  private rafId: number | null = null;

  constructor(
      width: number,
      height: number,
      scale: number,
      dropAlphaTexture: HTMLImageElement,
      dropColorTexture: HTMLImageElement,
      options?: Partial<RaindropsOptions>
  ) {
    this.width = width;
    this.height = height;
    this.scale = scale;
    this.dropAlphaTexture = dropAlphaTexture;
    this.dropColorTexture = dropColorTexture;
    this.options = Object.assign({}, defaultRaindropsOptions, options);

    // 初始化画布系统
    this.canvas = createCanvas(this.width, this.height);
    this.ctx = this.canvas.getContext('2d')!;
    // this.ctx.imageSmoothingQuality = 'high'; // 优化图像平滑度
    const density = this.dropletsPixelDensity;
    this.droplets = createCanvas(this.width * density, this.height * density);
    this.dropletsCtx = this.droplets.getContext('2d')!;
    // this.dropletsCtx.fillStyle = '#000'; // 初始化为黑色背景
    // 预渲染雨滴图形资源
    this.renderDropGraphics();
    // 启动动画循环
    this.update();
  }

  get deltaR() {
    return this.options.maxR - this.options.minR;
  }

  get area() {
    return (this.width * this.height) / this.scale;
  }

  get areaMultiplier() {
    return Math.sqrt(this.area / (1024 * 768));
  }

  /**
   * 预渲染不同透明度的雨滴图形
   * 预计算雨滴的图形和水痕清除工具,避免在动画循环中重复计算,从而提升性能
   * 通过分离预渲染和实时绘制,确保了雨滴动画的流畅性
   */
  private renderDropGraphics() {
    // 雨滴基础尺寸
    const dropSize = 64
    const dropBuffer = createCanvas(dropSize, dropSize);
    const dropBufferCtx = dropBuffer.getContext('2d')!;
    // 生成不同透明度的雨滴图形
    this.dropsGfx = Array.from({length: 255}, (_, index) => {
      const drop = createCanvas(dropSize, dropSize);
      const dropCtx = drop.getContext('2d')!;

      dropBufferCtx.clearRect(0, 0, dropSize, dropSize);

      // 1. 绘制基础颜色层(使用预设的 dropColor 纹理)
      dropBufferCtx.globalCompositeOperation = "source-over"; // 合成模式:覆盖(默认)
      dropBufferCtx.drawImage(this.dropColorTexture, 0, 0, dropSize, dropSize); // 绘制颜色纹理

      dropBufferCtx.globalCompositeOperation = 'screen' // 合成模式:滤色(变亮,叠加蓝色)
      dropBufferCtx.fillStyle = `rgba(0, 0, ${index}, 1)`; // 蓝色通道随 i 增大(0→254)
      dropBufferCtx.fillRect(0, 0, dropSize, dropSize); // 填充蓝色层

      // 2. 应用透明度遮罩(通过 alpha 纹理控制形状)
      dropCtx.globalCompositeOperation = "source-over"; // 合成模式:覆盖
      dropCtx.drawImage(this.dropAlphaTexture, 0, 0, dropSize, dropSize); // 绘制透明度纹理(形状)

      dropCtx.globalCompositeOperation = 'source-in'; // 合成模式:仅保留重叠部分(形状裁剪)
      dropCtx.drawImage(dropBuffer, 0, 0, dropSize, dropSize); // 将临时画布内容裁剪为透明度形状
      return drop
    })

    // 初始化水痕清除画笔(圆形遮罩)
    this.clearDropletsGfx = createCanvas(128, 128)
    const clearCtx = this.clearDropletsGfx.getContext('2d')!;
    clearCtx.fillStyle = '#000'
    clearCtx.beginPath()
    clearCtx.arc(64, 64, 64, 0, Math.PI * 2)
    clearCtx.fill()
  }

  private clearCanvas() {
    this.ctx.clearRect(0, 0, this.width, this.height);
  }

  private drawDroplet(x: number, y: number, r: number) {
    this.drawDrop(this.dropletsCtx, Object.assign(Object.create(initDrop), {
      x: x * this.dropletsPixelDensity,
      y: y * this.dropletsPixelDensity,
      r: r * this.dropletsPixelDensity
    }))
  }

  private drawDrop(ctx: CanvasRenderingContext2D, drop: Drop) {
    if (this.dropsGfx.length > 0) {
      let x = drop.x
      let y = drop.y
      let r = drop.r
      let spreadX = drop.spreadX
      let spreadY = drop.spreadY

      let scaleX = 1
      let scaleY = 1.5
      // 将半径增量归一化为 0~1 的数值, * 0.9将范围缩小为 0~0.9避免取到 dropsGfx 数组的最大索引,预留边界
      let d = Math.max(0, Math.min(1, ((r - this.options.minR) / (this.deltaR)) * 0.9));
      // 扩展程度越大,分母越大,整个分数越小,因为dropsGfx存储的雨滴缓存,下标越大,越清晰
      d *= 1 / (((drop.spreadX + drop.spreadY) * 0.5) + 1);

      ctx.globalAlpha = 1;
      ctx.globalCompositeOperation = "source-over"; // 合成模式设为“正常覆盖”(新图形覆盖旧内容)

      // 将 d 转换为 `dropsGfx` 的数组索引(0 到数组长度-1)
      d = Math.floor(d * (this.dropsGfx.length - 1));
      ctx.drawImage(this.dropsGfx[d],
          // 绘制位置(x 方向):雨滴中心 x 坐标减去横向扩展后的半径,再乘以整体缩放 `this.scale`
          (x - (r * scaleX * (spreadX + 1))) * this.scale,
          // 绘制位置(y 方向):雨滴中心 y 坐标减去纵向扩展后的半径,再乘以整体缩放 `this.scale`
          (y - (r * scaleY * (spreadY + 1))) * this.scale,
          // 绘制宽度:横向扩展后的直径(2r)乘以缩放因子和整体缩放
          (r * 2 * scaleX * (spreadX + 1)) * this.scale,
          // 绘制高度:纵向扩展后的直径(2r)乘以缩放因子和整体缩放
          (r * 2 * scaleY * (spreadY + 1)) * this.scale
      )
    }
  }

  // 小水滴的清理、生成和最终渲染
  private updateDroplets(timeScale: number) {
    // 纹理清理剩余次数大于0执行清理
    if (this.textureCleaningIterations > 0) {
      this.textureCleaningIterations -= timeScale;
      this.dropletsCtx.globalCompositeOperation = 'destination-out'; // 合成模式:擦除目标区域
      this.dropletsCtx.fillStyle = `rgba(0, 0, 0, ${0.05 * timeScale})`;
      this.dropletsCtx.fillRect(0, 0, this.width * this.dropletsPixelDensity, this.height * this.dropletsPixelDensity);
    }
    if (this.options.raining) {
      this.dropletsCounter += this.options.dropletsRate * timeScale * this.areaMultiplier //累计生成计数器(速率×时间×区域乘数)
      times(this.dropletsCounter, (i) => {
        this.dropletsCounter--
        this.drawDroplet(
            random(this.width / this.scale),
            random(this.height / this.scale),
            random(this.options.dropletsSize[0], this.options.dropletsSize[1], (n) => {
              return n * n;// 大小:从[2,4]中随机(通过n²调整概率,小尺寸更常见)
            })
        )
      })
    }
    this.ctx.drawImage(this.droplets, 0, 0, this.width, this.height);
  }

  clearDroplets(x: number, y: number, r = 30) {
    let ctx = this.dropletsCtx;
    ctx.globalCompositeOperation = "destination-out";
    ctx.drawImage(
        this.clearDropletsGfx!,
        (x - r) * this.dropletsPixelDensity * this.scale,
        (y - r) * this.dropletsPixelDensity * this.scale,
        (r * 2) * this.dropletsPixelDensity * this.scale,
        (r * 2) * this.dropletsPixelDensity * this.scale * 1.5
    )
  }

  eraseDroplets(x: number, y: number, w: number, h: number) {
    let ctx = this.dropletsCtx;
    ctx.globalCompositeOperation = "destination-out";
    ctx.fillRect(x, y, w, h);
    this.drops.forEach(drop => {
      if (drop.x * this.scale > x
          && drop.x * this.scale < x + w
          && drop.y * this.scale > y
          && drop.y * this.scale < y + h) {
        drop.killed = true
      }
    })
  }

  createDrop(options: Drop): Drop | null {
    if (this.drops.length >= this.options.maxDrops * this.areaMultiplier) return null;
    return Object.assign(Object.create(initDrop), options);
  }

  addDrop(drop: Drop) {
    if (this.drops.length >= this.options.maxDrops * this.areaMultiplier || drop == null) return false;
    this.drops.push(drop);
    return true;
  }

  clearDrops() {
    this.drops.forEach((drop) => {
      setTimeout(() => {
        drop.shrink = 0.1 + (random(0.5));
      }, random(1200))
    })
    this.clearTexture();
  }

  clearTexture() {
    this.textureCleaningIterations = 50;
  }

  private updateRain(timeScale: number) {
    let rainDrops = [];
    if (this.options.raining) {
      let limit = this.options.rainLimit * timeScale * this.areaMultiplier
      let count = 0
      while (chance(this.options.rainChance * timeScale * this.areaMultiplier) && count < limit) {
        count++

        let r = random(this.options.minR, this.options.maxR, (n) => {
          return Math.pow(n, 3);
          // 用于调整雨滴半径的概率分布,使较大的雨滴半径更易被选中
          // 当 n=10(最小半径)时,权重为 10³=1000;
          // 当 n=20 时,权重为 20³=8000(是 n=10 的 8 倍);
          // 当 n=40(最大半径)时,权重为 40³=64000(是 n=10 的 64 倍)。
          // 因此,较大的半径值会被更频繁地生成,使雨滴效果更偏向于大尺寸雨滴。
        });
        let rainDrop = this.createDrop(Object.assign(Object.create(initDrop), {
          x: random(this.width / this.scale),
          y: random((this.height / this.scale) * this.options.spawnArea[0], (this.height / this.scale) * this.options.spawnArea[1]),
          r,
          momentum: 1 + ((r - this.options.minR) * 0.1) + random(2),
          spreadX: 1.5,
          spreadY: 1.5
        }));
        if (rainDrop != null) {
          rainDrops.push(rainDrop);
        }
      }
    }
    return rainDrops;
  }

  // 雨滴动画的状态更新核心,负责处理雨滴的生成、移动、碰撞、消亡等全生命周期管理
  private updateDrops(timeScale: number) {
    let newDrops: Drop[] = [] // 存储本帧存活的雨滴

    this.updateDroplets(timeScale)
    let rainDrops = this.updateRain(timeScale)
    newDrops = newDrops.concat(rainDrops);
    // 将存活的雨滴按照y轴坐标从小到大排序 +a.x/+b.x 是为什么确保相同y坐标根据x坐标从小到大排序
    this.drops.sort((a, b) => {
      let va = (a.y * (this.width / this.scale)) + a.x;
      let vb = (b.y * (this.width / this.scale)) + b.x;
      return va > vb ? 1 : va == vb ? 0 : -1;
    })
    this.drops.forEach((drop, i) => {
      if (!drop.killed) {
        // 雨滴 “缓慢下落” 的概率控制  (drop.r - 最小半径调整值) * (0.1 / 半径范围差) * 时间缩放
        // 0.1 / this.deltaR 的本质是归一化处理,通过将雨滴半径的绝对差值除以半径范围(deltaR),抵消了 maxR 和 minR 配置差异对概率的影响,
        // 使得无论雨滴的大小范围如何设置,“缓慢下落” 的触发概率始终保持在合理的相对水平,最终让雨滴的动态行为更自然、稳定
        if (chance((drop.r - (this.options.minR * this.options.dropFallMultiplier)) * (0.1 / this.deltaR) * timeScale)) {
          // 雨滴的动量(momentum)会增加一个随机值((drop.r / maxR) * 4)
          drop.momentum += random((drop.r / this.options.maxR) * 4);
        }
        // 小尺寸雨滴的自动收缩
        if (this.options.autoShrink && drop.r <= this.options.minR && chance(0.05 * timeScale)) {
          drop.shrink += 0.01;
        }
        drop.r -= drop.shrink * timeScale;
        if (drop.r <= 0) drop.killed = true;

        //生成拖尾
        if (this.options.raining) {
          // 记录一个进度值,用于判断是否生成拖尾,可以理解为,速度越大,越容易生成
          drop.trailProgress += drop.momentum * timeScale * this.options.trailRate;
          if (drop.trailProgress > drop.trailThreshold) {
            let trailDrop = this.createDrop(Object.assign(Object.create(initDrop), {
              x: drop.x + (random(-drop.r, drop.r) * 0.1),
              y: drop.y - (drop.r * 0.01),
              r: drop.r * random(...this.options.trailScaleRange),
              spreadY: drop.momentum * 0.1,
              parent: drop
            }));

            if (trailDrop != null) {
              newDrops.push(trailDrop);

              drop.r *= Math.pow(0.97, timeScale);
              drop.trailProgress = 0;
              drop.trailThreshold = random(this.options.minR, this.options.maxR) - (drop.momentum * 2 * this.options.trailRate) + (this.options.maxR - drop.r);
            }
          }
        }

        //规格化散布
        drop.spreadX *= Math.pow(0.4, timeScale);
        drop.spreadY *= Math.pow(0.7, timeScale);

        //更新位置
        let moved = drop.momentum > 0;
        if (moved && !drop.killed) {
          drop.y += drop.momentum * this.options.globalTimeScale;
          drop.x += drop.momentumX * this.options.globalTimeScale;
          if (drop.y > (this.height / this.scale) + drop.r) {
            drop.killed = true;
          }
        }
        // 检查碰撞
        let checkCollision = (moved || drop.isNew) && !drop.killed;
        drop.isNew = false;

        if (checkCollision) {
          // 只遍历70个,避免全量遍历所有雨滴,优化性能
          this.drops.slice(i + 1, i + 70).forEach((drop2) => {
            //basic check
            if (
                drop != drop2 &&
                drop.r > drop2.r &&
                drop.parent != drop2 &&
                drop2.parent != drop &&
                !drop2.killed
            ) {
              let dx = drop2.x - drop.x;
              let dy = drop2.y - drop.y;
              let d = Math.sqrt((dx * dx) + (dy * dy));
              // 当两雨滴的实际距离 d 小于此阈值时判定为碰撞
              // drop.momentum * this.options.collisionRadiusIncrease * timeScale 表示动量越大、时间缩放系数越高,碰撞范围越大
              if (d < (drop.r + drop2.r) * (this.options.collisionRadius + (drop.momentum * this.options.collisionRadiusIncrease * timeScale))) {
                let pi = Math.PI;
                let r1 = drop.r;
                let r2 = drop2.r;
                let a1 = pi * (r1 * r1);
                let a2 = pi * (r2 * r2);
                let targetR = Math.sqrt((a1 + (a2 * 0.8)) / pi); // 合并后的半径
                if (targetR > this.options.maxR) {
                  targetR = this.options.maxR;
                }
                drop.r = targetR;
                drop.momentumX += dx * 0.1; // 根据碰撞方向调整水平动量
                drop.spreadX = 0;
                drop.spreadY = 0;
                drop2.killed = true;
                // 新动量(取较大值,且不超过 40)
                drop.momentum = Math.max(drop2.momentum, Math.min(40, drop.momentum + (targetR * this.options.collisionBoostMultiplier) + this.options.collisionBoost));
              }
            }
          });
        }
        //放慢动量
        drop.momentum -= Math.max(1, (this.options.minR * 0.5) - drop.momentum) * 0.1 * timeScale;
        if (drop.momentum < 0) drop.momentum = 0;
        drop.momentumX *= Math.pow(0.7, timeScale);

        if (!drop.killed) {
          newDrops.push(drop);
          if (moved && this.options.dropletsRate > 0) this.clearDroplets(drop.x, drop.y, drop.r * this.options.dropletsCleaningRadiusMultiplier);
          this.drawDrop(this.ctx, drop);
        }
      }
    }, this)

    this.drops = newDrops;
  }

  private update() {
    this.clearCanvas()

    let now = Date.now();
    if (!this.lastRender) this.lastRender = now;
    // 计算时间缩放因子(用于平衡不同帧率下的动画速度)
    const delta = now - this.lastRender;
    let timeScale = delta / ((1 / 60) * 1000); // // 理想60帧的单帧时间约16.666ms,timeScale = 实际时间差 / 理想单帧时间
    if (timeScale > 1.1) timeScale = 1.1 //防止帧率过低时动画加速过快

    timeScale *= this.options.globalTimeScale //用户可配置的动画速度
    this.lastRender = now;

    this.updateDrops(timeScale)

    this.rafId = requestAnimationFrame(this.update.bind(this));
  }

  destroy() {
    if (this.rafId) {
      cancelAnimationFrame(this.rafId);
      this.rafId = null;
    }
    this.drops = [];
  }
}着色器
片段着色器waterFrag.glsl是能够实现逼真物理效果的重要部分, 该着色器用于渲染水雨滴效果,核心功能包括:
- 模拟水面或雨滴的折射扭曲(通过背景纹理的偏移采样)
- 叠加前景/背景天气纹理(如雨水、阳光等)
- 计算高光反射(模拟水滴的光泽)
- 处理视差效果(鼠标移动时前景/背景的相对偏移)
- 控制整体亮度、透明度和阴影(增强真实感) 其代码如下:
点击查看代码
text
precision mediump float;

// ---------------------------
//  Uniform 变量(由 CPU 传递的全局参数)
// ---------------------------
uniform sampler2D u_waterMap;    // 动态水纹/雨滴纹理(由 raindrops.js 生成)
uniform sampler2D u_textureShine; // 高光纹理(模拟水滴反光)
uniform sampler2D u_textureFg;   // 前景纹理(如雨水、雾气等前景层)
uniform sampler2D u_textureBg;   // 背景纹理(如天空、云层等背景层)

// 顶点着色器传递的纹理坐标
varying vec2 v_texCoord;

// 画布相关参数
uniform vec2 u_resolution;       // 画布分辨率(宽, 高)
uniform vec2 u_parallax;         // 鼠标移动产生的视差偏移量(x, y)
uniform float u_parallaxFg;      // 前景视差强度(偏移幅度)
uniform float u_parallaxBg;      // 背景视差强度(偏移幅度)
uniform float u_textureRatio;    // 背景纹理宽高比(用于适配画布)

// 渲染开关
uniform bool u_renderShine;      // 是否启用高光效果
uniform bool u_renderShadow;     // 是否启用阴影效果

// 视觉参数
uniform float u_minRefraction;   // 最小折射强度(背景扭曲最小偏移量)
uniform float u_refractionDelta; // 折射强度范围(最大 - 最小)
uniform float u_brightness;      // 整体亮度系数
uniform float u_alphaMultiply;   // 透明度乘法因子
uniform float u_alphaSubtract;   // 透明度减法因子


// ---------------------------
//  辅助函数
// ---------------------------
/**
 * 颜色混合函数:基于透明度混合前景与背景色
 * @param bg 背景颜色
 * @param fg 前景颜色
 * @return 混合后的颜色(包含透明度)
 */
vec4 blend(vec4 bg, vec4 fg) {
  vec3 bgm = bg.rgb * bg.a;  // 背景色按透明度加权
  vec3 fgm = fg.rgb * fg.a;  // 前景色按透明度加权
  float ia = 1.0 - fg.a;     // 背景剩余可见度
  float a = fg.a + bg.a * ia; // 最终透明度
  vec3 rgb = (fgm + bgm * ia) / a; // 按透明度归一化混合色
  return vec4(rgb, a);
}

/**
 * 获取单个像素的纹理坐标增量
 * @return 像素尺寸(1/分辨率)
 */
vec2 pixel() {
  return vec2(1.0, 1.0) / u_resolution;
}

/**
 * 计算视差偏移量
 * @param v 视差强度(控制偏移幅度)
 * @return 视差偏移的纹理坐标
 */
vec2 parallax(float v) {
  return u_parallax * pixel() * v; // 视差 = 鼠标偏移 * 像素尺寸 * 强度
}

/**
 * 获取修正后的背景纹理坐标(适配画布宽高比)
 * @return 缩放后的纹理坐标(避免拉伸变形)
 */
vec2 scaledTexCoord() {
  float ratio = u_resolution.x / u_resolution.y; // 画布宽高比
  float ratioDelta = ratio - u_textureRatio;      // 画布与纹理宽高比差异

  vec2 scale = vec2(1.0);
  vec2 offset = vec2(0.0);

  if (ratioDelta >= 0.0) {
    // 画布更宽:垂直方向缩放并居中
    scale.y = 1.0 + ratioDelta;
    offset.y = ratioDelta / 2.0;
  } else {
    // 画布更高:水平方向缩放并居中
    scale.x = 1.0 - ratioDelta;
    offset.x = -ratioDelta / 2.0;
  }

  // 转换为标准化纹理坐标并应用缩放/偏移
  return (gl_FragCoord.xy / u_resolution + offset) / scale;
}

/**
 * 采样水纹纹理(包含视差偏移)
 * @param dx 水平偏移量(像素)
 * @param dy 垂直偏移量(像素)
 * @return 水纹纹理颜色(包含位置、厚度、透明度信息)
 */
vec4 fgColor(float dx, float dy) {
  float p2 = u_parallaxFg * 2.0; // 前景视差扩展范围
  vec2 scale = vec2(
    (u_resolution.x + p2) / u_resolution.x, // 水平缩放(适配视差偏移)
    (u_resolution.y + p2) / u_resolution.y  // 垂直缩放(适配视差偏移)
  );

  vec2 scaledTex = gl_FragCoord.xy / u_resolution / scale; // 缩放后的纹理坐标
  vec2 offset = vec2(
    (1.0 - 1.0/scale.x)/2.0, // 水平居中偏移
    (1.0 - 1.0/scale.y)/2.0  // 垂直居中偏移
  );

  // 采样水纹纹理(添加像素偏移和视差)
  return texture2D(u_waterMap, scaledTex + offset + pixel()*vec2(dx, dy) + parallax(u_parallaxFg));
}


// ---------------------------
//  主渲染逻辑
// ---------------------------
void main() {
  // 1. 采样背景纹理(应用背景视差偏移)
  vec4 bg = texture2D(u_textureBg, scaledTexCoord() + parallax(u_parallaxBg));

  // 2. 获取当前像素的水纹数据(位置、厚度、透明度)
  vec4 cur = fgColor(0.0, 0.0); // 采样当前像素的水纹纹理
  float d = cur.b;              // 水纹厚度(影响折射强度)
  float x = cur.g;              // 水纹 X 方向偏移量(0~1)
  float y = cur.r;              // 水纹 Y 方向偏移量(0~1)
  float a = clamp(cur.a * u_alphaMultiply - u_alphaSubtract, 0.0, 1.0); // 计算最终透明度

  // 3. 计算折射偏移(模拟水纹扭曲背景)
  vec2 refraction = (vec2(x, y) - 0.5) * 2.0; // 将偏移量转换为 [-1, 1] 范围(表示扭曲方向)
  vec2 refractionParallax = parallax(u_parallaxBg - u_parallaxFg); // 视差补偿(前景与背景的偏移差)

  // 计算折射后的前景纹理坐标(背景坐标 + 折射偏移 + 视差补偿)
  vec2 refractionPos = scaledTexCoord()
    + refraction * (u_minRefraction + d * u_refractionDelta) * pixel() // 折射偏移 = 方向 * 强度 * 像素尺寸
    + refractionParallax;

  // 4. 采样前景纹理(带折射效果)
  vec4 tex = texture2D(u_textureFg, refractionPos);

  // 5. 渲染高光(如果启用)
  if (u_renderShine) {
    float maxShine = 490.0;         // 最大高光强度
    float minShine = maxShine * 0.18; // 最小高光强度
    // 高光位置:基于水纹扭曲方向和厚度(厚度越大,高光越靠中心)
    vec2 shinePos = vec2(0.5, 0.5) + refraction * (-(minShine + (maxShine - minShine) * d) / 512.0);
    vec4 shine = texture2D(u_textureShine, shinePos); // 采样高光纹理
    tex = blend(tex, shine); // 叠加高光到前景
  }

  // 6. 渲染阴影(如果启用)
  if (u_renderShadow) {
    // 采样水纹下方区域的透明度(模拟阴影)
    float borderAlpha = fgColor(0.0, -d * 6.0).a;
    borderAlpha = clamp(borderAlpha * u_alphaMultiply - (u_alphaSubtract + 0.5), 0.0, 1.0);
    borderAlpha *= 0.2; // 削弱阴影强度
    vec4 border = vec4(0.0, 0.0, 0.0, borderAlpha); // 纯黑色阴影
    tex = blend(border, tex); // 叠加阴影到前景
  }

  // 7. 最终颜色混合(前景与背景按透明度混合)
  gl_FragColor = blend(bg, vec4(tex.rgb * u_brightness, a));
}总结
一些重要步骤在上面代码中注释出来了,其他次要代码我就不一一列出来了。
这次重构让我明白:原来 WebGL + Canvas 还能这样用,还让我深刻理解到,知识是无法掌握不完的,我对前端领域的探索微不足道。另外,通过逆向《Rain Day》,我不仅还原了喜欢的壁纸,还深入理解了图形交互的底层逻辑 —— 这种从0到1的掌控感,比单纯使用壁纸更令人兴奋。
源码已上传代码托管平台,如果有想也研究研究的小伙伴可以做参考:rainDay