Appearance

ThreeJs实现物理小球
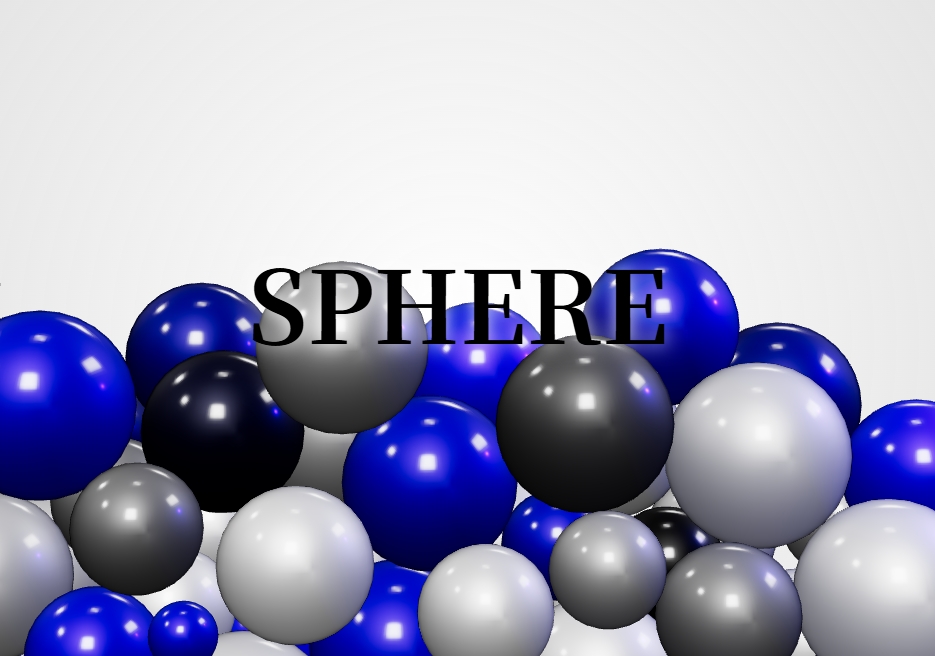
最近在重温了 Three.js,一直想找个实战项目练练手,加深对 3D 场景搭建、物理模拟以及交互功能实现的理解。在网上寻觅许久后,终于发现了一个非常契合我需求的项目 —— 一个能够生成若干具有物理特性的球体,并支持鼠标交互的酷炫案例。然而,当我满怀期待地打开代码时,却被眼前的压缩混淆代码泼了一盆冷水。密密麻麻的字符,几乎没有任何可读性,变量名也全是无意义的单字符,这无疑给我的学习之路设置了巨大的障碍。
但越是有挑战,我越是充满斗志。我经过不懈努力,一步一步将代码还原(点击查看效果),过程中不断加深了对Three.js使用的熟练程度,也学到了很多有用的技巧,下面就为大家分享这个项目的核心实现逻辑以及重要步骤代码。
封装核心功能
javascript
class ThreeWrapper {
  constructor(options) {
    this.options = {...options };
    this.initCamera();
    this.initScene();
    this.initRenderer();
    this.resize();
    this.initObservers();
  }
  // 其他方法...
}ThreeWrapper 类对 Three.js 的核心功能进行了封装。在构造函数中,依次初始化相机、场景、渲染器,并设置初始尺寸和各种事件观察者。它就像是整个 3D 场景的大管家,负责处理场景的初始化、尺寸调整、渲染控制以及元素可见性变化等一系列重要操作。
实现物理模拟
javascript
class PhysicsObject {
  update(frameData) {
    const { config, center, positionData, sizeData, velocityData } = this;
    // 控制球体处理
    let startIndex = 0;
    if (config.controlSphere0) {
      startIndex = 1;
      controlSpherePosition.fromArray(positionData, 0);
      controlSpherePosition.lerp(center, 0.1).toArray(positionData, 0);
      tempVector1.set(0, 0, 0).toArray(velocityData, 0);
    }
    // 位置和速度更新
    for (let index = startIndex; index < config.count; index++) {
      const offset = 3 * index;
      tempVector2.fromArray(positionData, offset);
      tempVector3.fromArray(velocityData, offset);
      tempVector3.y -= frameData.delta * config.gravity * sizeData[index];
      tempVector3.multiplyScalar(config.friction);
      tempVector3.clampLength(0, config.maxVelocity);
      tempVector2.add(tempVector3);
      tempVector2.toArray(positionData, offset);
      tempVector3.toArray(velocityData, offset);
    }
    // 碰撞检测和处理
    for (let index = startIndex; index < config.count; index++) {
      const offset = 3 * index;
      tempVector2.fromArray(positionData, offset);
      tempVector3.fromArray(velocityData, offset);
      const size = sizeData[index];
      for (let otherIndex = index + 1; otherIndex < config.count; otherIndex++) {
        const otherOffset = 3 * otherIndex;
        tempVector4.fromArray(positionData, otherOffset);
        tempVector5.fromArray(velocityData, otherOffset);
        const otherSize = sizeData[otherIndex];
        tempVector6.copy(tempVector4).sub(tempVector2);
        const distance = tempVector6.length();
        const combinedSize = size + otherSize;
        if (distance < combinedSize) {
          const correction = combinedSize - distance;
          tempVector7.copy(tempVector6).normalize().multiplyScalar(0.5 * correction);
          tempVector8.copy(tempVector7).multiplyScalar(Math.max(tempVector3.length(), 1));
          tempVector9.copy(tempVector7).multiplyScalar(Math.max(tempVector5.length(), 1));
          tempVector2.sub(tempVector7);
          tempVector3.sub(tempVector8);
          tempVector2.toArray(positionData, offset);
          tempVector3.toArray(velocityData, offset);
          tempVector4.add(tempVector7);
          tempVector5.add(tempVector9);
          tempVector4.toArray(positionData, otherOffset);
          tempVector5.toArray(velocityData, otherOffset);
        }
      }
      // 边界处理
      if (Math.abs(tempVector2.x) + size > config.maxX) {
        tempVector2.x = Math.sign(tempVector2.x) * (config.maxX - size);
        tempVector3.x = -tempVector3.x * config.wallBounce;
      }
      // 其他轴边界处理类似...
      tempVector2.toArray(positionData, offset);
      tempVector3.toArray(velocityData, offset);
    }
  }
}PhysicsObject 类的 update 方法是实现物理模拟的核心。它根据时间帧数据,首先处理控制球体的位置(如果启用),然后依次更新每个球体的位置和速度,考虑重力、摩擦力和最大速度的影响。接着,通过嵌套循环检测球体之间的碰撞,一旦发生碰撞,就计算校正向量来调整球体的位置和速度。最后,对球体进行边界检测,确保它们不会超出设定的边界范围,实现了较为真实的物理行为模拟。
实现鼠标交互
javascript
function createInteractiveElement(options) {
  const element = {
    position: new Vector2(),
    normalizedPosition: new Vector2(),
    isHovering: false,
    onEnter() { },
    onMove() { },
    onClick() { },
    onLeave() { },
    ...options
  };
  function innerFunction(domElement, elementOptions) {
    if (!elementMap.has(domElement)) {
      elementMap.set(domElement, elementOptions);
      if (!isListening) {
        document.body.addEventListener("pointermove", handlePointerMove);
        document.body.addEventListener("pointerleave", handlePointerLeave);
        document.body.addEventListener("click", handleClick);
        isListening = true;
      }
    }
  }
  innerFunction(options.domElement, element);
  element.dispose = () => {
    const domElement = options.domElement;
    elementMap.delete(domElement);
    if (elementMap.size === 0) {
      document.body.removeEventListener("pointermove", handlePointerMove);
      document.body.removeEventListener("pointerleave", handlePointerLeave);
      document.body.removeEventListener("click", handleClick);
      isListening = false;
    }
  };
  return element;
}createInteractiveElement 函数用于创建交互式元素。它通过监听鼠标的移动、离开和点击事件,来实现与 3D 场景中的对象进行交互。当鼠标移动到特定区域时,触发相应的事件处理函数,例如在本项目中,通过射线投射器检测鼠标与场景中平面的交点,从而控制物理球体的中心位置,实现了有趣的交互效果。
通过这次代码还原和学习,我不仅完成了一个很棒的 Three.js 项目实践,也积累了宝贵的经验。在面对复杂代码时,不要畏惧,合理利用工具,结合自己的思考和分析,总能找到解决问题的办法。希望我的这段经历和分享,能够对同样在学习 Three.js 的小伙伴有所帮助,让我们一起在 3D 开发的世界里不断探索前行!
完整代码:spherePacking